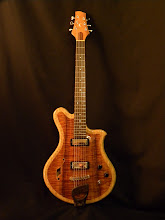
I've always liked the idea of using hot hide glue, but never felt like I had a good feel for how to work it. So I thought I would mix up a fresh pot for the new Archtop, to get a bit more practice.

Just mix equal parts water and dry hide glue, and heat.

While the glue was heating, I trimmed the guitar sides to length and fit them into the mold.

Unfortunately, the sides needed some clean up from the bending process. So a bit of sanding was in order.

After sanding the sides, I cut and fit the neck and tail blocks.

Gluing the tail block.

And the neck block.

Tuesday 11:30am
While the glue dries...I head over to Guru to do some repairs. First up...an '88 Les Paul. The customer bought a wiring kit off the interweb and wanted us to put it in. No Prob!

The old wiring was mostly intact. However, the last person to solder in the cavity, managed to burn almost every wire. Bummer!

Here's the new assembly about to go in and the old one on it's way out.

I got the new assembly in and cleaned everything up as best I could.

With the wiring completed and tested I cleaned and setup the guitar. For once it was all pretty straight forward. On to the next one!

Next up?... A Washburn Somethin'-er-other.

The neck on this guitar was literally coming off. The screws that hold the neck on were totally stripped. I could almost put my pinky finger in the gap between the neck and body. Sounds bad, but the fix is pretty easy.

Just take off the neck...

Glue a dowel into the old screw holes...

...and drill new ones. The guitar also needed a shim to get the neck angle correct.

Putting it all back together.

The gap is gone. Everything is much more solid.

The next guitar...is a Les Paul copy. The customer brought it to us after he refinished it. He wanted a custom wiring job, and the guitar was missing the nut and needed a complete setup.

I must admit that this guitar grew on me. it's kind of cool.

Bag-o-parts.

Time to start wiring.

The old wiring harness was a bit suspect...I salvaged what I could.

Wiring all finished. Two volume controls, with a master tone, and a kill switch.

On to the new nut and setup.

The bone blank before shaping.

I've got the nut fitted and roughly shaped.

Here's the finish product.

Next...Ouch!... this Yamaha has seen better days! When this guitar came into the shop, the action was high. It was obvious that it needed a neck reset. We talked with the customer about it and he said that he wanted us to go ahead and do the neck set. For those of you who don't know, a neck reset is a common repair. Almost every acoustic guitar will need one at some point during it's lifetime. Unfortunately the process is fairly major surgery. The Cliff's Notes version goes something like this: You heat the neck joint until the glue releases and the neck come free from the body. You can then shave the heel of the neck to change the angle that it contacts the body. There is a little voodoo and some geometry involved, but basically you can take a guitar with high action and make it playable again. For a while, that was the plan with this Yamaha. Although I've successfully reset the neck on quite a few guitars, I was feeling a bit uneasy about this one. (Over the years I've learned to trust those feelings.) I talked the repair through with my partners in crime at Guru Guitars, Howard and Gene. None of us felt good about it. So we started to do some research. Turns out, there is a lot of confusing information out there about what kind of neck joint this guitar actually has, what glues Yamaha used, ETC. Eventually, we figured out that the neck joint in this guitar is a hybrid type which is not easily re-settable. Time for plan B...

One way to lower the action on a acoustic guitar is to shave the bridge down. The stock bridge on this guitar is...well...kind of awful! So plan B, is to make a new bridge with a standard bone saddle. That way we can make it a bit thinner to bring the action height down. In addition to the new bridge, We decided to do a little creative refretting to try and bring th action down a hair more.

With our plan sorted out, I got to work pulling frets.

And planing the fingerboard.

Before I knew it, 7pm rolled around and it was time to head home.
Tomorrow I'll try to finish up this refret and get started on the bridge.

1 comment:
Dude, you make me want to fix guitars! Love the dowel trick for stripped holes. I have been known to jam a few pieces of a scrap low E string into a loose strap peg hole to tighten it up. The guitar strings work fab because they are so grippy and don't strip out. The dowel trick being the classier of the two naturally...
Post a Comment