The days of my weeks are divided between building my own guitars and repairing instruments which come through the shop at Guru.
Monday, 9:00am:
After years of hand bending guitar sides, I finally found the time (last week)to put together a side bending jig. There are plenty of guitar builder supply websites which sell these jigs for $400+, but for the price of some scrap plywood and a few springs I put one together. Why it's taken me so long to do so? I have no idea. But I digress, this morning I put the new jig to work bending a new set of sides for the 415 Archtop prototype. First the sides needed a little bit of love to get them ready...
The roughed out sides next to the carved 415 archtop plates

The sides were a bit thick so I needed to take them down a little

Into the thickness sander they go

Much better!

I then decided to taper them. I've always like the look of a tapered guitar body. So I made a makeshift tapering jig for my tablesaw...ugly but it got the job done!

My side bending jig with the body form loaded in.

Like many other builders, I sandwich the sides between sheets of spring steel for support while bending. Here is one side on the steel.

There are many ways to bend guitar sides in a jig like this, But I decided to use a silicon heating blanket for a more controlled heat. Here is the blanket laid out on the spring steel ready for the sides.

The whole assembly is in the bender. (The guitar sides and heating blanket sandwiched between steel slats.) Ready to begin!

It's all heating up!

After bringing the heat up, the waist is screwed down and I'm getting ready to bend the upper and lower bouts.

All the bending is done. Now I cook it for a few minutes and turn it off to cool. Time to do some repairs!

Monday 11:05am
After a quick clean up of my bench I grab the first guitar on the list. A Strat copy. The customer brought it in for a setup, and he wants to put on slightly heavier strings. No worries!
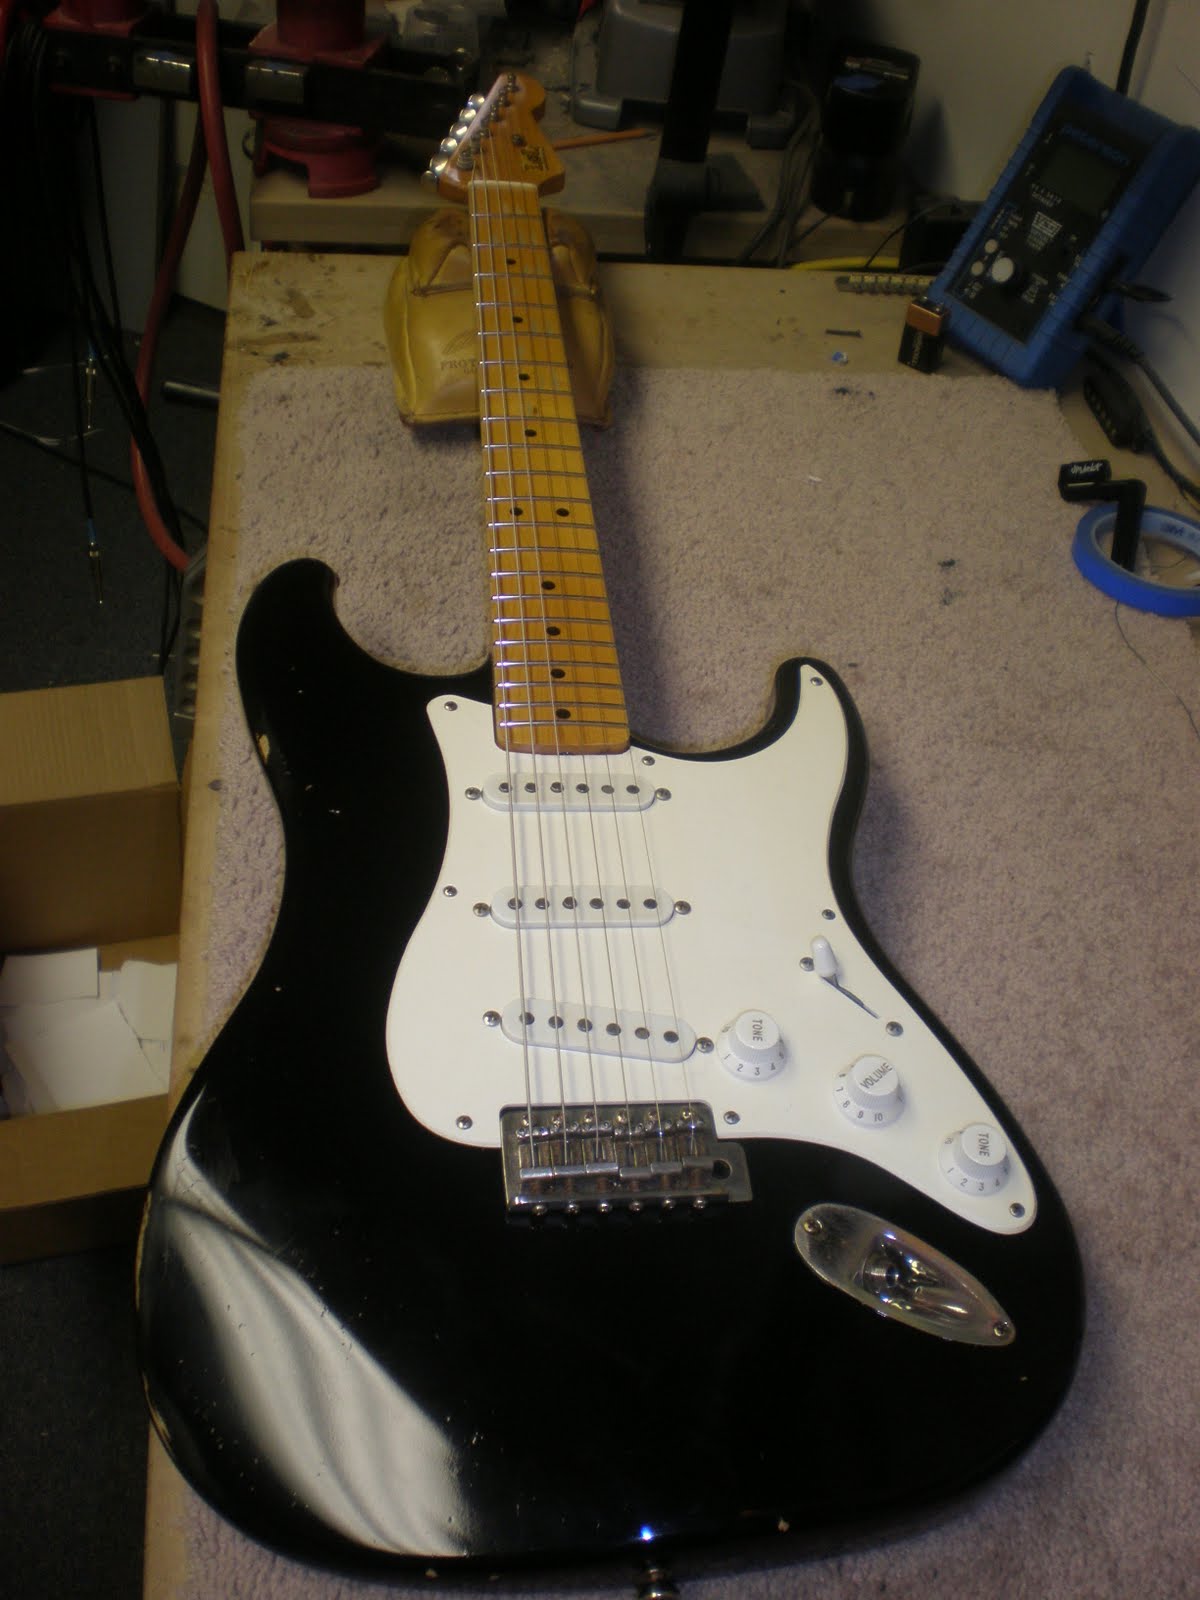
LSL...Hmmmmm...Never heard of it. The number of Strat copies in the world never ceases to amaze me. Do we really need all of them? I don't know, but that is a rant for another time!

With the old strings off, it's time to clean up the guitar. Thankfully this one is relatively goo free.

With new strings installed, I adjust the neck and start to set the action height. Surprise! the old nut is cut too low! A quick call to the owner follows...and we get the thumbs up to replace the nut, so out with the old...

...In with the new. With the nut replaced, I restring and finish the setup. New nut, new strings, and de-gooed, the guitar is ready to go back home. Next!

Next up? An imported PRS. The customer brought it in, complaining of a Sitar-like vibration on the high E string. Buzzes and rattles can often be hard to diagnose. This one was easy to find, but hard to fix.

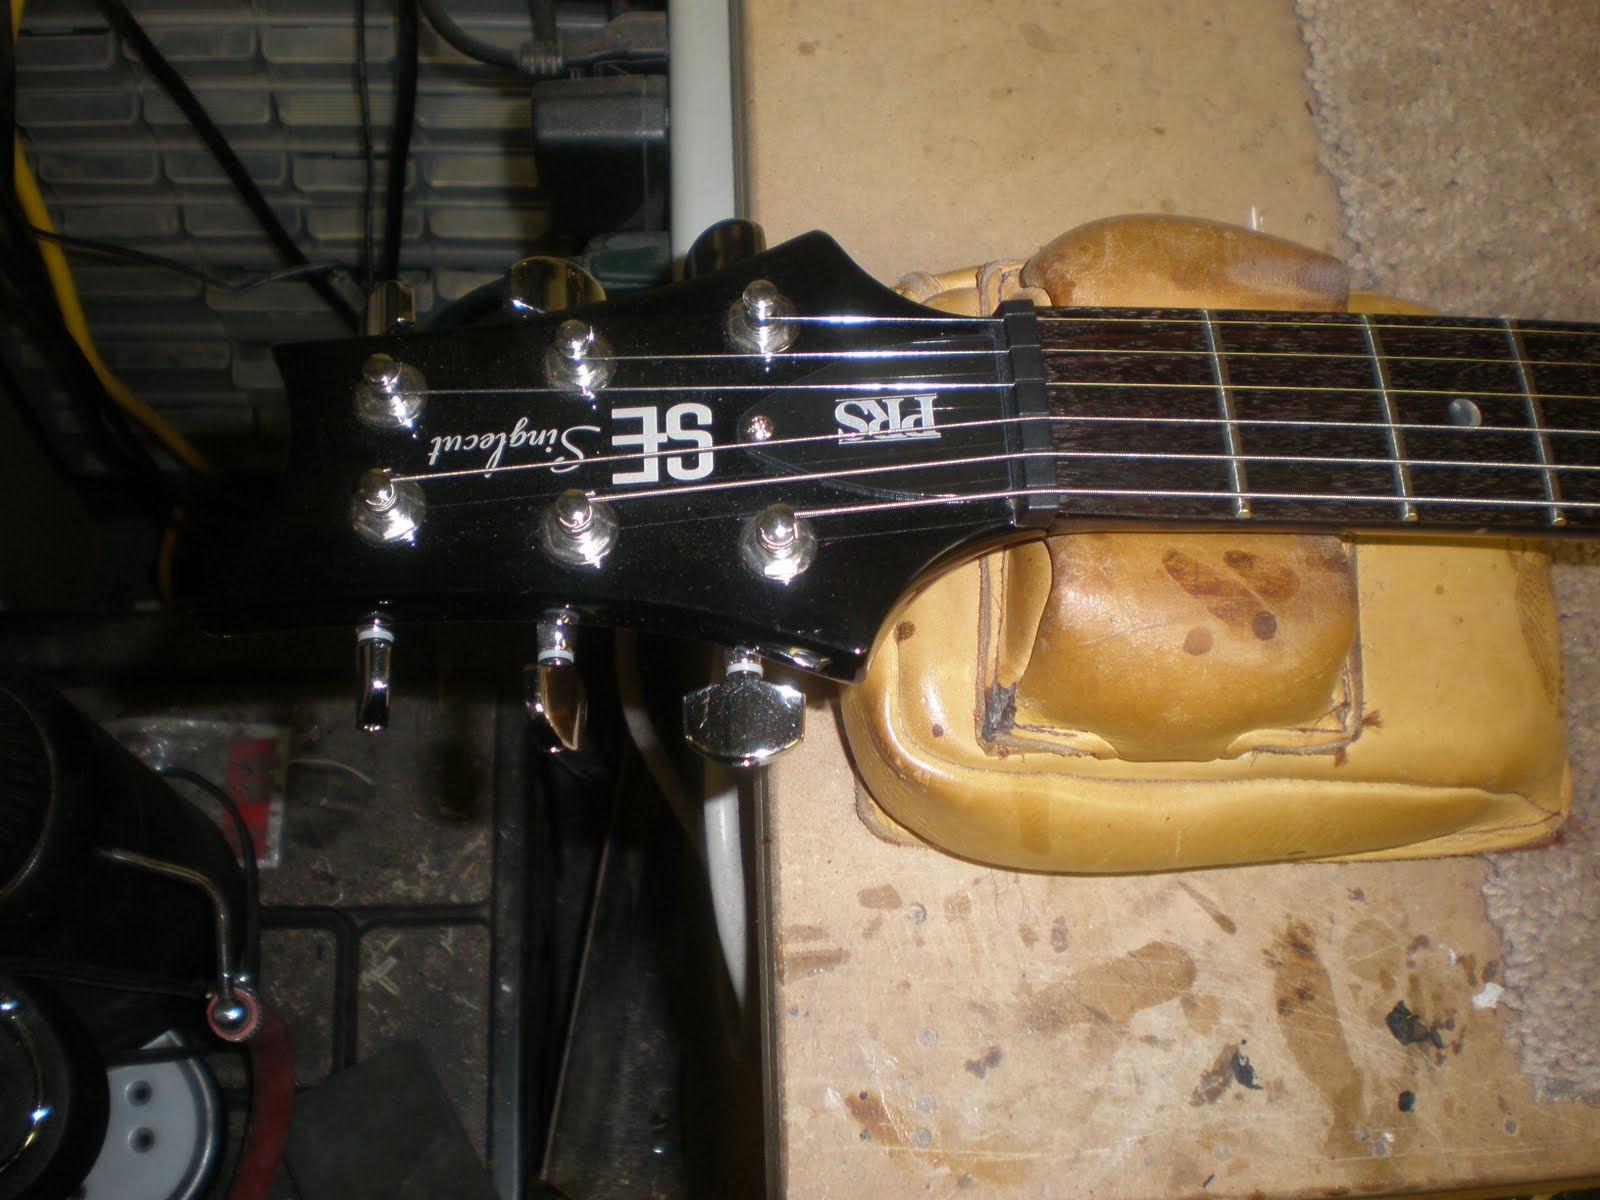
After a minute or two of poking and prodding it was fairly easy to see that the vibration originated around the bridge saddle. It's not uncommon to have a burr develop in this area, so my first move was to take the string loose and smooth out the area where the string wraps around the bridge. I was not that lucky! So much for the easy fix! After looking around the bridge a bit closer, I realized that the whole bridge and post assembly was tilting forward due to the string tension and design of the bridge itself. In fact the tilt was so severe that it caused the string to lay flat on the top of the bridge with no break angle behind the front contact point. 'Well there's yer problem!' I took all of the strings loose and discovered that the threaded posts which hold the bridge were loose in their bushings. Additionally the bridge itself fit too loosely on posts. All of this slop added up to a really annoying buzz. My solution was to cut thin brass shims to tighten up the fit between the bridge and it's posts. I then cut two small, thin brass shims which I stuck between the threads of the bushings in the body and the posts. This seemed to tighten everything up enough to move the bridge closer the the intended position. Here you can see the brass shims between the posts and the bridge. I later trimmed them down to fit under the post tops out of sight.

It's not a particularly elegant solution, but sometimes you have to work with what you got. I could go on a rant about imported guitars and cheap hardware, but I get it...I understand the need for inexpensive instruments, and cheap hardware is just part of the territory. The sad fact is, If I didn't build guitars, I would probably have a cheap imported guitar. Anyway, at this point I called it good and sent the guitar on its way.

I spent a lot more time than I wanted to on the PRS. I was so wrapped up in the hulabaloo that I nearly forgot about an appointment to take my truck in for repair. So i dashed out the door.
Monday 4:30pm
Even though I was late, I couldn't resist checking on the sides I bent this morning. Success! They fit the mold nicely!

I Clamped everything up for the night I can't wait to get started tomorrow!

Well it was a bad day for the old paycheck, But I made a little progress. No leaving early tomorrow! See you then!
1 comment:
That side bender jig is pretty sweet! *High Five*
Post a Comment