Thursday, October 28, 2010

My Week in Pictures: Friday 10.29.10

Friday, 8:30am

Today started much like yesterday...with some clean up!


Hide glue fingerprints are everywhere!


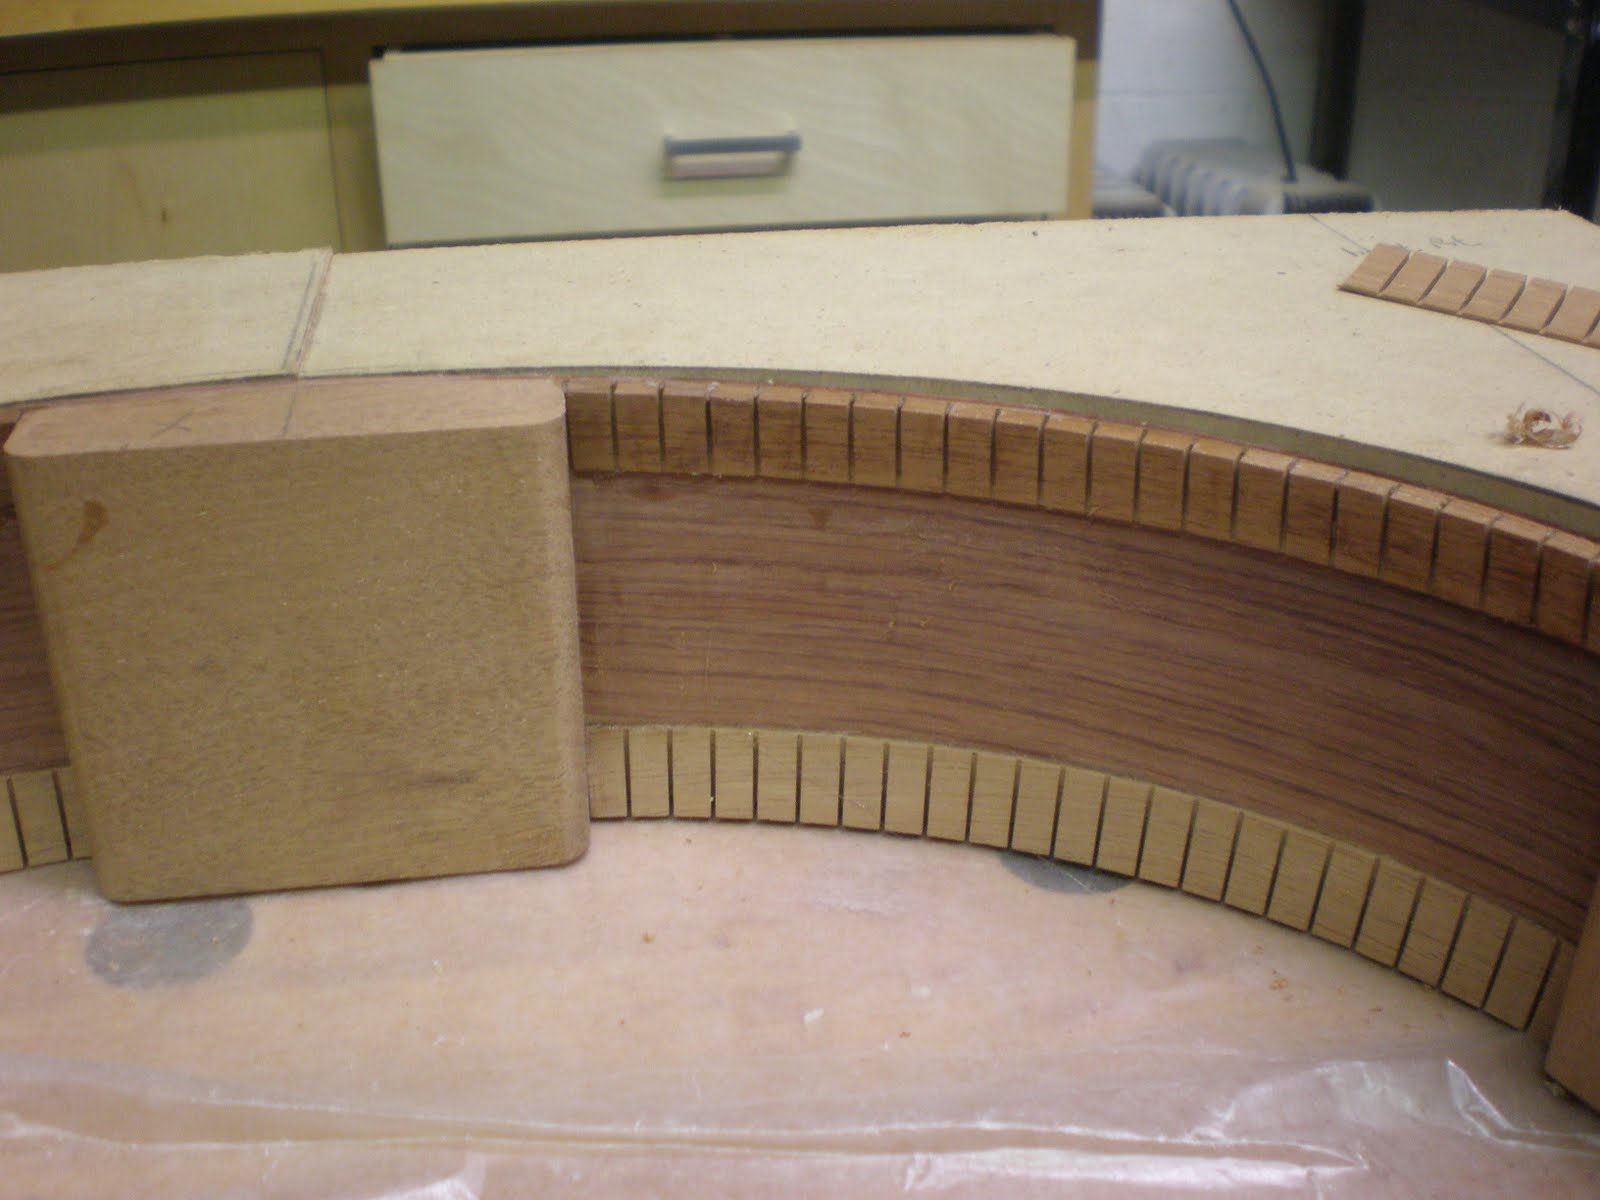
After a little bit of sanding everything is cleaned up! The next step is to add the vertical reinforcement strips which help to strengthen the sides.


One more.


Here's one with the clamps taken off.


With the vertical strips installed I add a bit of kerfed lining over the top. When the glue dries, the ring is ready for the top and back


11:00am
As the glue drys, I head over to Guru. During this week My brothers in arms, Gene and Horward had their own projects to tackle...


A customer brought in his 60's Vox Starstream. He asked Gene to reverse engineer the onboard effects and build them into a stompbox!


It's a huge project. Here's Gene in middle of the prototyping process.


A few of the parts in the original are not available any more, so Gene had to figure out some modern alternatives. Wires everywhere!


So far, it looks, and sounds cool though!


Meanwhile, Howard, is in the home stretch of refinishing a mid 60's Fender bass 5. I had no idea that 5 string basses were made that early!. When the customer brought this bass in, it was in bad shape. Someone tried a DIY refinish job and the body was pretty awful! After much rebuilding, he's getting close now! It's ready to assemble with a fresh finish and a custom machined re-production bridge(the old original was missing).


I was interested to see how the Yamaha was doing!


The bridge glued on great! so it was time to make the saddle.


And then a new nut.


I drill the bridge pin holes a bit small so I can ream them out for a nice fit.


With the strings on everything is looking good!


The finished nut.


Action is looking a lot better!


This guitar really turned out great! All of the hard work paid off!


It plays great! Another one brought back from the edge! I'm sure the customer will be really happy!


On to the next one...and oh what a tough one it is! Just kidding. Only a bad output jack! It takes a couple of minutes to solder in a new one.


Up next? a funky...


Conquerer Bruno!


...and by funky...I mean funky!


It's nice of somebody to mark the bridge location! Ha!


The electronics were not working. I thought there was a big problem, but they just turned out to be really dirty! So, A good cleaning was in order.


Before I knew it, 5:30pm rolled around, and I had to get going...We're off to be reasonable and non-confrontational at Jon Stewart's Rally to Restore Sanity! Have a great weekend everybody! Thanks for checking out the blog! I plan to keep posting pictures of the archtop build. Stay tuned for that!

My Week in Pictures: Thursday, 10.28.10

Thursday, 9:00am

Over the years, I've gotten pretty good at working cleanly with regular wood glues. However, I seem to always make a mess with hide glue. This morning was all about clean up.


So, I hit the linings with a bit of sandpaper.


they're looking a bit better now.


With the top linings clean, I got to work on the back linings. Deja Vu.


Looks familiar huh!


11:00am
I finished up the linings and headed over to Guru. First order of business is to remove that hideous bridge from the Yamaha. I use a heat lamp to warm the bridge and soften the glue.


Heating up the bridge is patient work. You have to be careful not to heat everything too much! Aluminium foil helps to keep the temperature down on the top. Too much heat and you might loosen some of the bracing inside the body. I definitely want to avoid that!


It takes a bit of time for the bridge to warm up. I use a putty knife with the edges ground down to work it loose a little bit at a time.


A little bit here...


...a little bit there.


You have to take your time, and work your way around the bridge. As everything warms up the glue will release.


It's getting there...


We're close now!


...And there it goes. The bridge came off pretty cleanly, no major damage. Yay!


The next step is to fill the holes left by posts of the old saddle assembly. We are definitely getting rid of that!


I found a piece of rosewood that was close to the right size for the new bridge. The grain was a bit askew so I laid out the new bridge to match the direction of the grain.


First I straighten one edge, with a bandsaw cut...


and a quick trip to the edge sander.


Then I traced the old bridge.


And started to shape the new one.


Making the end cuts.


The rosewood blank was a bit too thick so I sent it through the sander. When I thought had it to the correct thickness I took the bridge back to the shop to check it on the guitar.


First I had to shave down the plugs which I glued into the top earlier. Lucky for me I sharpened my chisels yesterday!


With a straightedge on the neck I checked the clearance at the bridge. Everything looks good! Time to finish shaping the bridge and cut the saddle slot.


Back to the bandsaw...


And the edge sander.


On to cut the saddle slot. For the guitar to play in tune, the slot needs to be angled. There are probably better ways to accomplish this, but I've been cutting the slot on my router table with an angled caul. Don't try this at home!


But seriously, I just set the fence, and mark the width of the cutter onto the table.


I double stick tape the caul onto the bridge, and mark the length of the slot I want to cut. I then lower the whole assembly on to the cutter and mill out the slot using the reference marks on the table as guides. I should have taken a lot more pictures!


Here is the end result.


Then I drill out the bridge pin holes.


The final step is to fit the bridge to the top of the guitar. Unfortunately, the top on this guitar is plywood and it has badly deformed over the years. There is a huge hump behind the bridge...Check out the gap! ouch!


I begin the fitting process, by positioning the bridge on a couple of pieces of tape. Using a sharp xacto knife I cut through the tape around the bridge. I then peel the bridge shape out. Next I scape and sand away all of the old glue to create a fresh surface to glue the new bridge on. Once this is done I place the bridge back in position and scribe around it to get an idea of where to remove wood in order to make it fit the curve of the top.


Next I stick a piece of sandpaper over the bridge location, place the bridge on top and sand away. The sandpaper conforms to the top of the guitar so eventually the bottom of the bridge gets shaped to match, at least in theory! In this case I wanted to try and flatten out the bump in the top a bit. So I took the bridge most of the way, but left a little bit of a gap. I then made a flat caul to put inside the box under the bridge location. When I glue the bridge on, I will clamp everything down to the flat caul. When all's said and done, I hope the top will look a little bit better. One thing's for sure, this bridge will sound much better!


Here's the new bridge, next to the old bridge. The glue surface is prepared and everything's ready to go. I leave the tape on to help position the bridge during the glue process.


And there you have it! Let's hope I did everything right!


Tomorrow, we put strings on it and find out of all of this hard work paid off!

Goodnight!

6:30pm