Tuesday, October 26, 2010

My Week in Pictures: Tuesday 10.26.10

Tuesday, 9:00am

I've always liked the idea of using hot hide glue, but never felt like I had a good feel for how to work it. So I thought I would mix up a fresh pot for the new Archtop, to get a bit more practice.


Just mix equal parts water and dry hide glue, and heat.


While the glue was heating, I trimmed the guitar sides to length and fit them into the mold.


Unfortunately, the sides needed some clean up from the bending process. So a bit of sanding was in order.


After sanding the sides, I cut and fit the neck and tail blocks.


Gluing the tail block.


And the neck block.


Tuesday 11:30am
While the glue dries...I head over to Guru to do some repairs. First up...an '88 Les Paul. The customer bought a wiring kit off the interweb and wanted us to put it in. No Prob!


The old wiring was mostly intact. However, the last person to solder in the cavity, managed to burn almost every wire. Bummer!


Here's the new assembly about to go in and the old one on it's way out.


I got the new assembly in and cleaned everything up as best I could.


With the wiring completed and tested I cleaned and setup the guitar. For once it was all pretty straight forward. On to the next one!


Next up?... A Washburn Somethin'-er-other.


The neck on this guitar was literally coming off. The screws that hold the neck on were totally stripped. I could almost put my pinky finger in the gap between the neck and body. Sounds bad, but the fix is pretty easy.


Just take off the neck...


Glue a dowel into the old screw holes...


...and drill new ones. The guitar also needed a shim to get the neck angle correct.


Putting it all back together.


The gap is gone. Everything is much more solid.


The next guitar...is a Les Paul copy. The customer brought it to us after he refinished it. He wanted a custom wiring job, and the guitar was missing the nut and needed a complete setup.


I must admit that this guitar grew on me. it's kind of cool.


Bag-o-parts.


Time to start wiring.


The old wiring harness was a bit suspect...I salvaged what I could.


Wiring all finished. Two volume controls, with a master tone, and a kill switch.


On to the new nut and setup.


The bone blank before shaping.


I've got the nut fitted and roughly shaped.


Here's the finish product.


Next...Ouch!... this Yamaha has seen better days! When this guitar came into the shop, the action was high. It was obvious that it needed a neck reset. We talked with the customer about it and he said that he wanted us to go ahead and do the neck set. For those of you who don't know, a neck reset is a common repair. Almost every acoustic guitar will need one at some point during it's lifetime. Unfortunately the process is fairly major surgery. The Cliff's Notes version goes something like this: You heat the neck joint until the glue releases and the neck come free from the body. You can then shave the heel of the neck to change the angle that it contacts the body. There is a little voodoo and some geometry involved, but basically you can take a guitar with high action and make it playable again. For a while, that was the plan with this Yamaha. Although I've successfully reset the neck on quite a few guitars, I was feeling a bit uneasy about this one. (Over the years I've learned to trust those feelings.) I talked the repair through with my partners in crime at Guru Guitars, Howard and Gene. None of us felt good about it. So we started to do some research. Turns out, there is a lot of confusing information out there about what kind of neck joint this guitar actually has, what glues Yamaha used, ETC. Eventually, we figured out that the neck joint in this guitar is a hybrid type which is not easily re-settable. Time for plan B...


One way to lower the action on a acoustic guitar is to shave the bridge down. The stock bridge on this guitar is...well...kind of awful! So plan B, is to make a new bridge with a standard bone saddle. That way we can make it a bit thinner to bring the action height down. In addition to the new bridge, We decided to do a little creative refretting to try and bring th action down a hair more.


With our plan sorted out, I got to work pulling frets.


And planing the fingerboard.


Before I knew it, 7pm rolled around and it was time to head home.

Tomorrow I'll try to finish up this refret and get started on the bridge.

Monday, October 25, 2010

My Week in Pictures: Monday 10.25.10

Monday 10.25.10
The days of my weeks are divided between building my own guitars and repairing instruments which come through the shop at Guru.

Monday, 9:00am:
After years of hand bending guitar sides, I finally found the time (last week)to put together a side bending jig. There are plenty of guitar builder supply websites which sell these jigs for $400+, but for the price of some scrap plywood and a few springs I put one together. Why it's taken me so long to do so? I have no idea. But I digress, this morning I put the new jig to work bending a new set of sides for the 415 Archtop prototype. First the sides needed a little bit of love to get them ready...


The roughed out sides next to the carved 415 archtop plates


The sides were a bit thick so I needed to take them down a little


Into the thickness sander they go


Much better!


I then decided to taper them. I've always like the look of a tapered guitar body. So I made a makeshift tapering jig for my tablesaw...ugly but it got the job done!


My side bending jig with the body form loaded in.


Like many other builders, I sandwich the sides between sheets of spring steel for support while bending. Here is one side on the steel.


There are many ways to bend guitar sides in a jig like this, But I decided to use a silicon heating blanket for a more controlled heat. Here is the blanket laid out on the spring steel ready for the sides.


The whole assembly is in the bender. (The guitar sides and heating blanket sandwiched between steel slats.) Ready to begin!


It's all heating up!


After bringing the heat up, the waist is screwed down and I'm getting ready to bend the upper and lower bouts.


All the bending is done. Now I cook it for a few minutes and turn it off to cool. Time to do some repairs!


Monday 11:05am

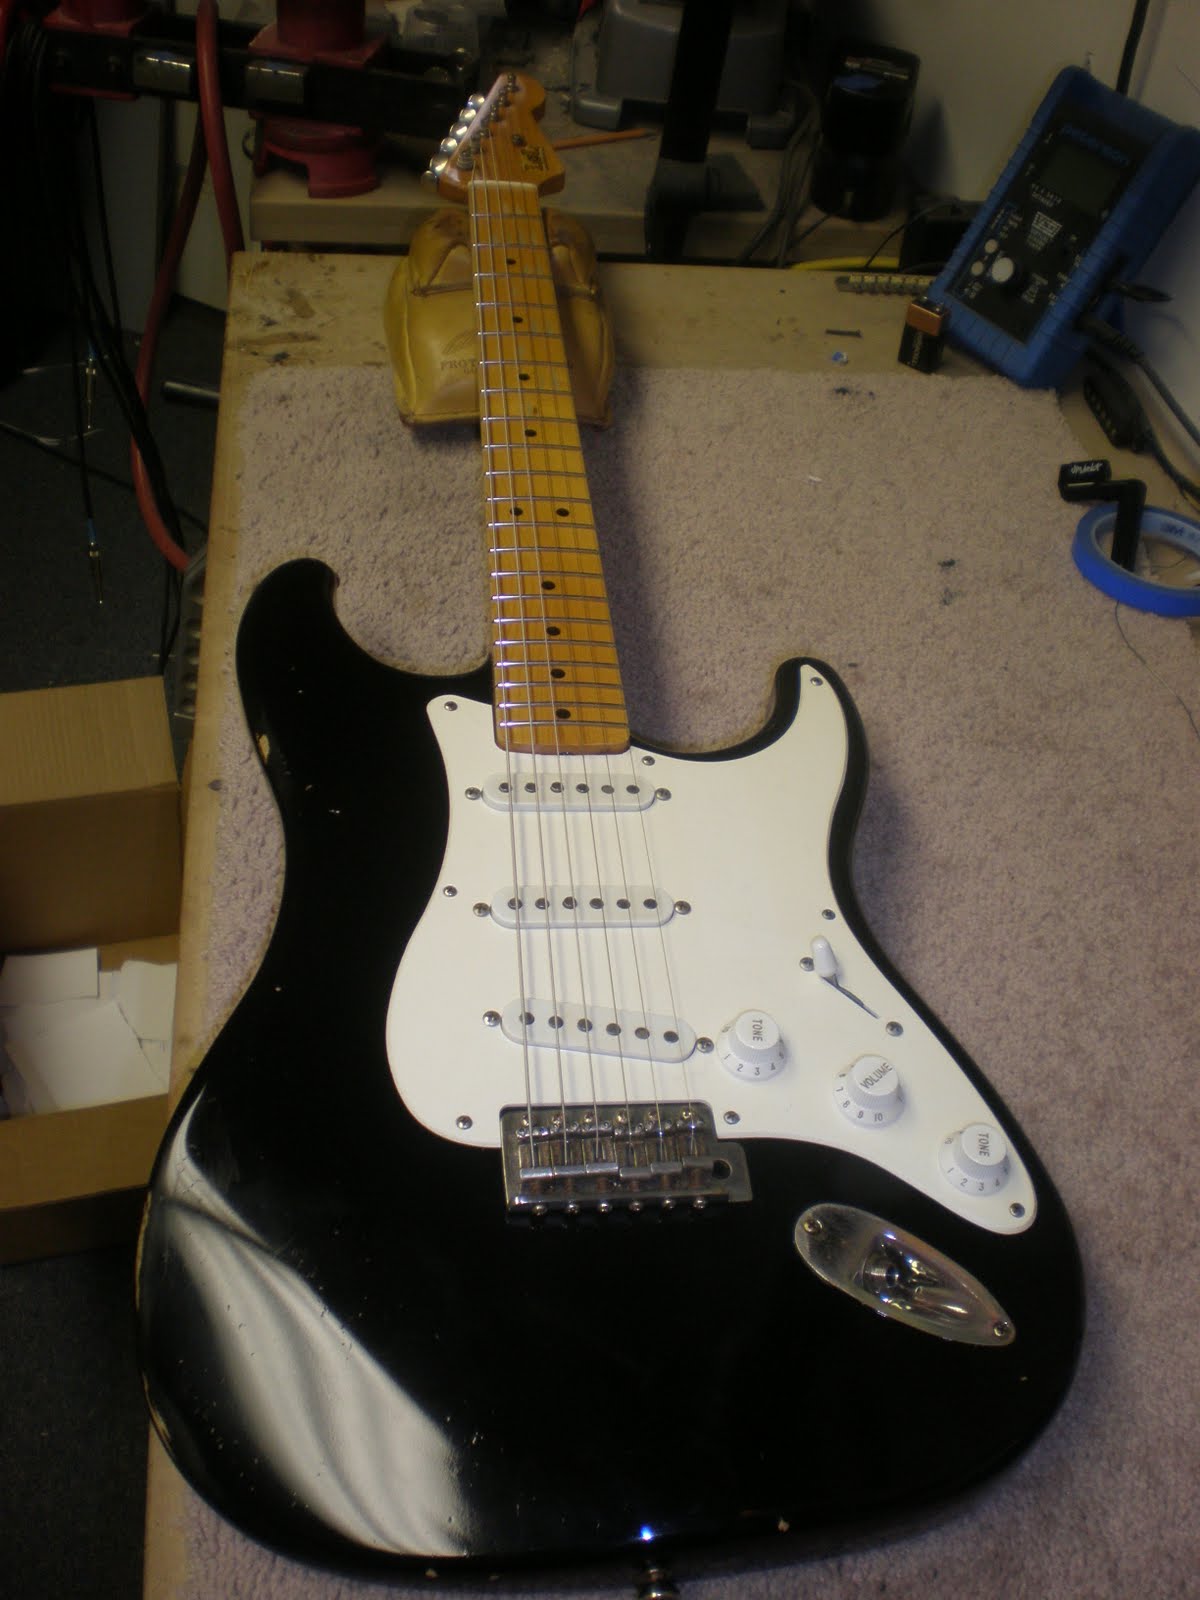
After a quick clean up of my bench I grab the first guitar on the list. A Strat copy. The customer brought it in for a setup, and he wants to put on slightly heavier strings. No worries!


LSL...Hmmmmm...Never heard of it. The number of Strat copies in the world never ceases to amaze me. Do we really need all of them? I don't know, but that is a rant for another time!


With the old strings off, it's time to clean up the guitar. Thankfully this one is relatively goo free.


With new strings installed, I adjust the neck and start to set the action height. Surprise! the old nut is cut too low! A quick call to the owner follows...and we get the thumbs up to replace the nut, so out with the old...


...In with the new. With the nut replaced, I restring and finish the setup. New nut, new strings, and de-gooed, the guitar is ready to go back home. Next!


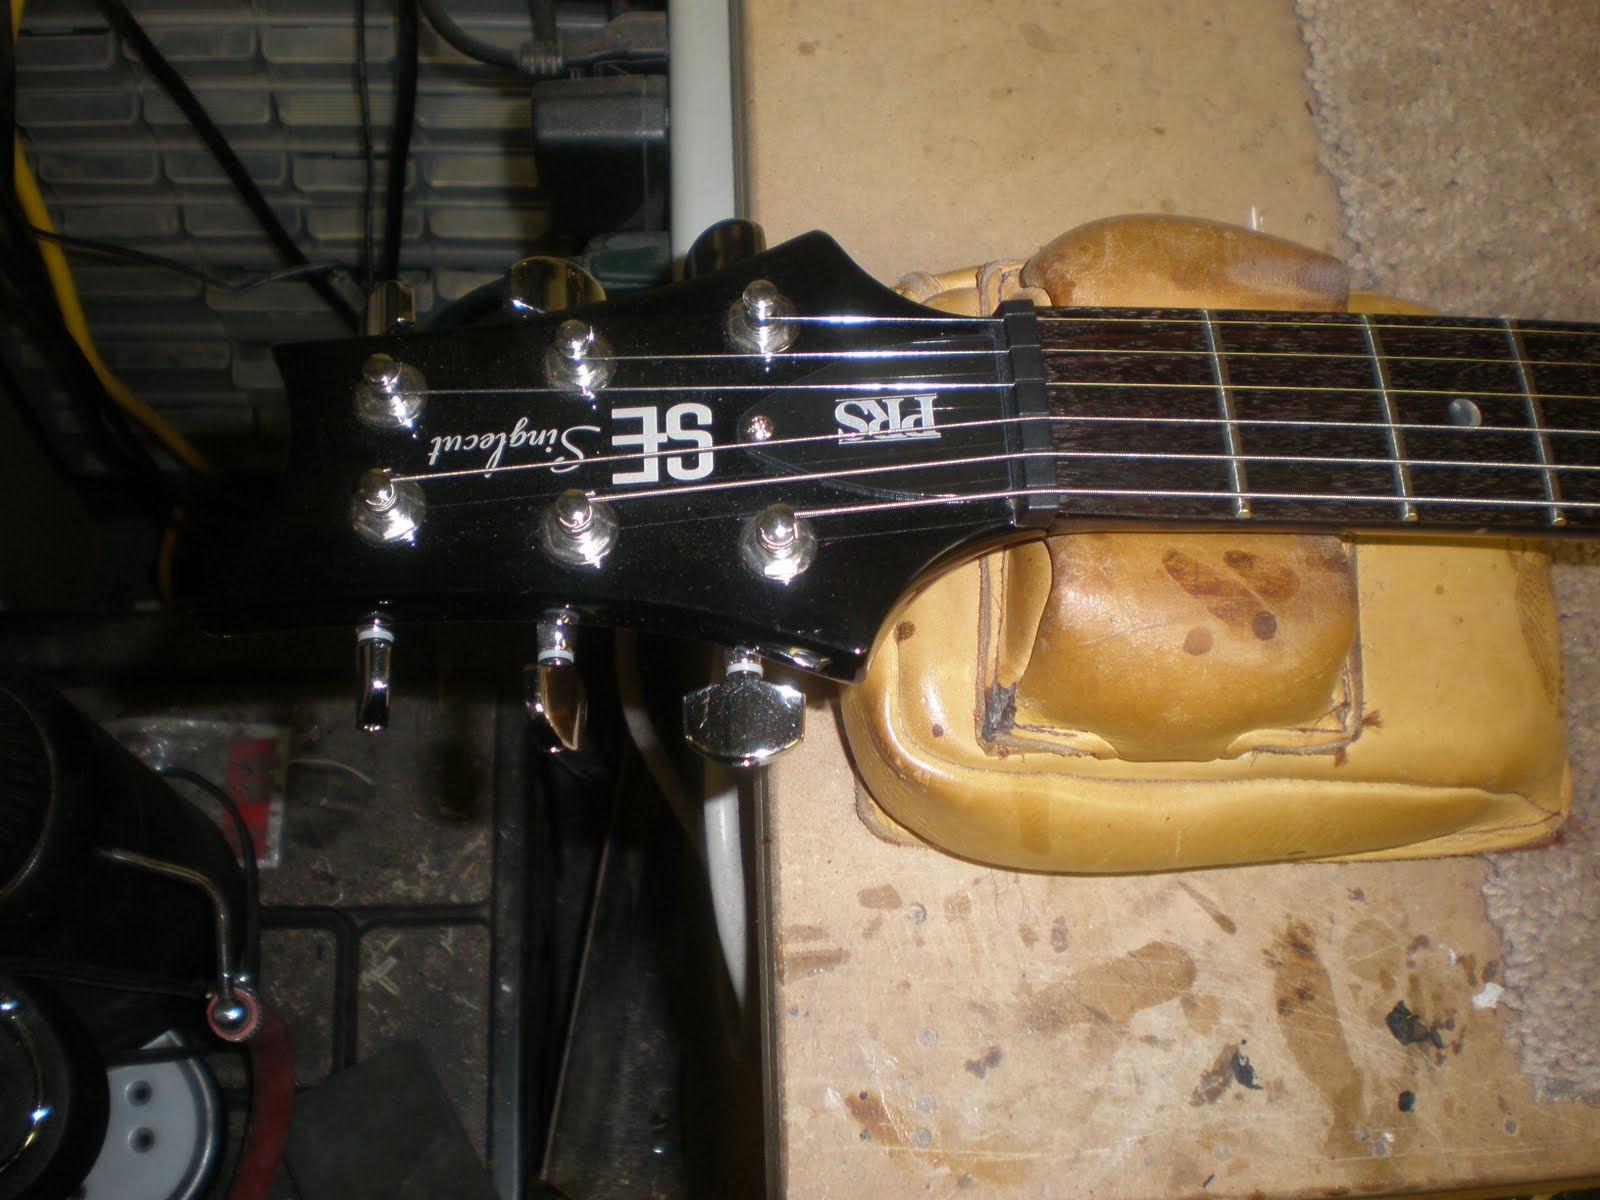
Next up? An imported PRS. The customer brought it in, complaining of a Sitar-like vibration on the high E string. Buzzes and rattles can often be hard to diagnose. This one was easy to find, but hard to fix.


After a minute or two of poking and prodding it was fairly easy to see that the vibration originated around the bridge saddle. It's not uncommon to have a burr develop in this area, so my first move was to take the string loose and smooth out the area where the string wraps around the bridge. I was not that lucky! So much for the easy fix! After looking around the bridge a bit closer, I realized that the whole bridge and post assembly was tilting forward due to the string tension and design of the bridge itself. In fact the tilt was so severe that it caused the string to lay flat on the top of the bridge with no break angle behind the front contact point. 'Well there's yer problem!' I took all of the strings loose and discovered that the threaded posts which hold the bridge were loose in their bushings. Additionally the bridge itself fit too loosely on posts. All of this slop added up to a really annoying buzz. My solution was to cut thin brass shims to tighten up the fit between the bridge and it's posts. I then cut two small, thin brass shims which I stuck between the threads of the bushings in the body and the posts. This seemed to tighten everything up enough to move the bridge closer the the intended position. Here you can see the brass shims between the posts and the bridge. I later trimmed them down to fit under the post tops out of sight.


It's not a particularly elegant solution, but sometimes you have to work with what you got. I could go on a rant about imported guitars and cheap hardware, but I get it...I understand the need for inexpensive instruments, and cheap hardware is just part of the territory. The sad fact is, If I didn't build guitars, I would probably have a cheap imported guitar. Anyway, at this point I called it good and sent the guitar on its way.


I spent a lot more time than I wanted to on the PRS. I was so wrapped up in the hulabaloo that I nearly forgot about an appointment to take my truck in for repair. So i dashed out the door.


Monday 4:30pm

Even though I was late, I couldn't resist checking on the sides I bent this morning. Success! They fit the mold nicely!


I Clamped everything up for the night I can't wait to get started tomorrow!

Well it was a bad day for the old paycheck, But I made a little progress. No leaving early tomorrow! See you then!

Monday, May 24, 2010

Madness

Alright, I'm not even going to say it...Yes it's been six months since my last post. I've been busy. Here's the short version of what I've been up to:

Repairs, Building, Shop re-organization, Hob-nobbing with rockstars. For those of you who don't really like to read, you can skip to the pictures now. For the rest of you, here are the details.

Guru Guitars continues to be crazy. We've had so much cool stuff come through the shop it's hard to remember it all. As always you should check out their website at www.guruguitarshop.com. I, for the most part, am uninvolved with the buying and selling of cool gear. Although, occasionally I am pulled from beneath the mountain of repair work to gaze longingly at a tube amp from the sixties or a guitar from the 50's. My current lust is for a '63 Blonde Tremolux, which winks at me from the show room floor. I'm a sucker for an old Fender.

Anyway, I've recently had a few cool guitars on the repair bench, amidst the never ending stream of Squire Stratocasters and cheap import acoustics. I did some major work to a 60's Gretsch Nashville. I re glued almost all of the braces on a 1950Gibson j-45. Refretted a couple of 70's Les Pauls. Tweaked a Cool Mosrite double neck. I've made it through countless,setups, refrets, wiring mods, crack triage, and yesterday I arrived at a place that was both satisfying and terrifying...the bottom of the list...EEEEEEEEEEEEKKKKKKK! We're caught up!

The Mosrite double neck! Pretty awesome!


The Gretsch, as it came into the shop. All of the parts were in a bag.


I had to refret the guitar and replace all of the crumbling binding around the neck. I was able to save the original side dots and reinstall them in the new binding!

The resurrected Gretsch. Original side dots in new binding!


Ready to rock again!


In the midst of all the repair mayhem I have managed to squeeze in a bit of building. I am always rethinking my "product line". I wrestle constantly with the feeling that I should nail down some specs which will be consistent... so when somebody orders guitar "A", guitar "A" always comes with particular features. Unfortunately curiosity often gets the best of me, and my attempts to standardize are once again put on hold. At this point, I enjoy the organic nature of my business and I feel like all of the experiments are valuable. I learn a lot from each new guitar. I really draw on this knowledge when I am asked to design a guitar for a new client. I've started to think of each of my models as a platform or basic starting point. From there I can mix and match building techniques and design ideas to personalize the sound and look for each client. There are still a lot of concepts I want to check out. Most recently, I re-designed the 504 and it's pretty cool if I do say so myself.


The new 504 body in progress.

Ready to spray!

The new 504.


The Tailpiece


I've also gotten back to the acoustic prototype which I started months/years ago. It's finally taking shape. the top is braced and after much tapping and carving I've glued it to the ring. It has a pleasing "Boing" when you tap on it; I'm excited to hear what it sounds like with strings on it. Of course there are already things I want to change on the next version, but I think this one will sound good. I hope to finish it in the next few months.


The new acoustic top. In the midst of carving braces.


The back.


Getting ready to glue the top to the ring.


Now on to the Hobb-nobbing with rockstars bit. As I mentioned in an earlier Blog post, the Spearhead guys have a couple of my guitars. Well, in May, they came through Raleigh and stopped by the shop to say hi. At that point I had just started the new 504 and they got to see it in the early stages. They played a great show that night and we got to hang for a bit afterwards. It was very cool. Fast-forward a few months...after finishing their summer tour, Spearhead was back in our neck of the woods. We made plans to meet up with them for their show down in Charlotte. After much prodding from Michelle I agreed to take the completed 504 down so the guys could see the final product. We met up with the guitar player Dave Shul and showed him the guitar. To my surprise, he asked if he could try it out at sound check and possibly play it in the show. I, of course said No! because I didn't want it scratched...just kidding! I said yes! I was blown away when he plugged it in and started putting the guitar through it's paces at full concert volume! I don't often get to hear my guitars played so loudly. I wasn't quite sure how the guitar would work, but it was really awesome! Well, to make a long story longer... He loved the guitar. He loved it so much, he played it for at least 10 or 12 songs during the concert. The guitar sounded great! We got some video footage, but unfortunately the concert was so loud that the tiny microphone on our video camera couldn't keep up. So the audio sucks. For now, we only have pictures. Boo! I'll try to piece together some clips that don't sound too bad. Anyway Dave loved the guitar and we talked a lot about making him one custom. I'm really excited about the project. Nothing is settled at this point, but I hope we can make it happen. Stay tuned!


Dave Shul and the new 504 in full shred mode!


That is all of the excitement for now. We are in the process of completely re-working the website, and might have t-shirts for sale in the near future. if you want one, shoot me an email. Talk to you in a few months!